25afbf
Facebook Pinterest Instagram Teachers Pay Teachers Blog Lovin' Image Map
Showing posts with label Math Stations. Show all posts

Wednesday, July 10, 2019

Everything You Need to Know to Flip Your Class

I've been flipping my 4th grade math class for about  years now and I can honestly say it's completely changed the way I teach.

I love sharing how I flip my class with other teachers and I always get asked a lot of questions.
What does a flipped class even mean?
When do you have kids watch videos?
Where do you get your videos?
How do you know your students are paying attention? 

That's why I decided to create this *free* video course on how to flip your class. 

Click the picture below to sign up now!


This email course consists of 4 videos where I walk you through everything you need to know to start flipping your own class.

I'll cover Flipping 101
- What is a flipped class?
- Why do I flip my class?
- What does my flipped math class look like?

You'll learn All About the Videos
- How do you make videos?
- Where can you find videos?
- How do you choose a good video for students?


I'll tell you how to Hold Students Accountable
- How do you know students are paying attention?
- How can you have students reflect after lessons?

Finally, I'll help you Put It All Together
- I'll give you bonus tips and tricks to make your life easier
- I'll show you what one of my flipped lessons looks like so you have an example


Sunday, July 24, 2016

Going Digital with Google: Google Slides (plus a link up!)

If you've been following along for a while, then you know my math workshop has been digital for the last 2 years. You also know that I've been using a website called Blendspace to house my math workshop directions. I even did a blog post you can check out.

I thought Blendspace was the greatest thing ever. And it still has some redeeming qualities, but it also had some downfalls. Like some days the site was reeaaaally slow to load. When I included sites to visit within blendspace it was a bit glitchy on the ipads. My class didn't have usernames so they were still recording work other places and both the kids and I were constantly clicking back and forth.

Now let's fast forward to January 2016. I discovered a great group of teacher-authors on Teachers Pay Teachers who introduced me to using Google Slides in place of Blendspace. Now I knew all about Google. My kids were using Google Drive to back things up and we used Google Classroom. That being said, it had never crossed my mind to use Google Slides in a new way!

So here are my top 3 things I love about using Google Slides for math workshop.
stay with me people, there's a link up at the bottom : )

#1
I can house EVERYTHING in one place. My directions are in slides. Any links or videos are in slides. Ask a reflection question? They type their answer right on the slide. Building something with manipulatives? Take a picture and (you guessed it) put it right on the slide. Seeing a theme here? This was a game changer folks. For me and the kids. In fact, when I asked what they liked about Google Slides, the #1 thing was no longer having to click back and forth or keep up with separate papers. 

#2
It works seamlessly with Google Classroom. I love that I can click the magical make a copy for each student button and voi la! Every kid has their own editable copy. Huge time saver! Google Classroom also automatically backs everything up to their Google Drive so it's a built in student portfolio. 
 What in the world is Google Classroom?! Read about it here

#3
I love that using Google Slides is teaching my kids valuable computer skills. These are skills that I think they will carry on for many years. Sometimes I forget that I need to teach them basic skills because they seem so tech savvy. 

Yeah that all sounds great, but what does it really look like?? Here's a sneak peek into my latest Google Slide on Comparing and Ordering numbers.

Congrats! You made it to the end. As promised...here's a fabulous link up hosted by Mrs. Beers, Danielle Knight and The Daring English Teacher for Innovative Classroom Learning Day. Check out the links below to find other blog posts and digital products to check out.

Leave a comment and let me know how you plan on using Google in your classroom this year!


Sunday, November 1, 2015

Rounding on a Number Line

Last month I wrote a post about how my kids were using the Number Line app to help with rounding - you can check out the post here.

Using an app is always a great way to give kids practice with math concepts, but it does not replace the time they need with concrete, hands-on materials. I really try to stick true to the process of concrete--> pictorial --> abstract. The number line app was pictorial practice for the kids.

I made sure to give them some concrete experiences during our guided math lessons on rounding.

I started my guided math lessons by activating their prior knowledge on rounding. They played a matching game with smaller numbers. They worked together to find all the matches.  This got them talking and thinking about rounding.

Next, we spent some time working through a guided practice page together, using a number line in a clear sheet protector and a counter.

We read through the problems together and then used the number line to help us round. The number we were rounding went on top and then we set up our number line, depending on the place we were rounding to. Finally, we placed the counter on the number line to represent where our original number would go.

This was a lot more difficult for some students than I was anticipating. They really struggled to figure out what numbers should go on the number line, and they also had trouble placing the counter. You can see that student had the counter much closer to 15,000 than it should be.

After lots of discussion, we would then slide the counter over to the number it would round to.

Finally, they had to do a few problems on their own for me to check for understanding.

If you're interested in using these ideas in your classroom, you can download my Guided Math Plans for Rounding Whole Numbers - it's available in my Teachers Pay Teachers store


Sunday, September 20, 2015

Digital Number Lines & Rounding

This week my kids are learning to round large numbers. I really want them to understand rounding and not just memorize tricks. In the past I would teach my kids a poem, and while they could round, they didn't really understand why.

Since my classroom is digital, I'm always looking for ways to use our ipads for our math workshop activities.

I found this *free* app called Number Line.


My kids are going to use this app to practice rounding some larger numbers. They'll take screen shots of each number they round and then put them together in pic collage. I made a video to show them how they'll be using the app for the activity.

Check it out:


Here's an example of one of my student's finished products:


How do you teach your kids rounding?

Sunday, September 13, 2015

Launching Math Workshop, Part 4


Just joining in? Check out the rest of this blog series!

Read on to find out what day 4 of math workshop looks like.

By day 4, I'm just excited that I've made it to the end of the first week! I'm also amazed by how well my kids are doing with math workshop. The structure is very different than what they're used to and there's a lot for them to figure out.

Day 4 is all about creating workshop rules & becoming independent.

Before the kids start working, we create an anchor chart on our math workshop rules. The class helps decide on the rules based on their experiences throughout the week. Of course I forgot to take a picture of our anchor chart...

Our rules focused on working the whole time, using math tools appropriately (tools, not toys), working together (helping, not giving answers), problem solving, and reading the directions (I really try to make a big deal out of this one). 

Once we've reviewed the rules and the structure of math workshop, I have the kids hold up a number to show me what box they are on in our blendspace. (Wondering what blendspace is? Check out this post).

Then we spend the rest of the time working on finishing up the activities. Here are a couple of pictures of my kids hard at work.


You can find all of the activities my kids did, including the video, in my Teachers Pay Teachers store.


That ends my week of launching math workshop! Over the next couple of weeks I'll be reinforcing routines with students and helping them understand where and how to turn their work in. By the 3rd week, I'll start pulling my guided math groups. 

Tuesday, September 1, 2015

Launching Math Workshop, Part 3


If you missed the first 2 parts of the series, you can check them out here:

Read on to find out what the 3rd day of math workshop looks like.

Day 3 is all about gradually releasing responsibility. 

I start off by having the kids talk about what we did the day before in math workshop. Through our discussion, they remember that we use the website blendspace and that they watched a math video. 

Wondering what the heck blendspace is? Check out this post

Then I let them know that today they'll be watching the video on their own. 

We are using Google Classroom this year, so I shared the link to the blendspace with my classes through that website. So to start off, the kids get onto Google Classroom and we walk through finding the blendspace. 

Once everyone has found the instructional video (included in their blendspace), we quickly review our anchor chart on watching videos. Then, they grab their headphones, spread out & get started. 

I walk around while they're watching the videos and make sure they're:
1. actually watching it
2. not experiencing any technical difficulties
3. remembering to complete their anchor chart

For today, I have them go back to their desks and read a book when they're finished. Once everyone has finished, we glue our charts in their journals and quickly review how the process went. I was pleased to see how much the kids enjoyed watching the videos. 


Then we looked at the directions for the next activity together. I model what the activity will look like and where they will find the math tools. We don't spend a lot of time talking about the rules for workshop yet. That will come tomorrow.

Once everyone understands what they need to do, they spread out again and get started on the activity. The activity they did was using place value blocks to build a number. Then they took pictures of each number and put them into PicCollage. Finally, they added the expanded notation for each number into their collage. 


Not everyone finished, but that was okay. I let them know that they will always have 2 days to work on the activities in each blendspace. 

Saturday, August 22, 2015

Launching Math Workshop, Part 2


If you missed part one of this series, be sure to check it out here to find out what I do on the first day of math workshop.

Read on to find out what the 2nd day of math workshop looks like.

For me, day 2 is all about *modeling*.

I start off by briefly explaining to the students what math workshop will look like this year:
- We'll use the website blendspace for their directions 
- They'll watch an instructional video for their lesson
- I'll be pulling groups every day

Then we pull up our first blendspace. Since our 1st unit is place value, I introduce workshop with a place value review.

You can find the blendspace here.

Every blendspace will start with a video. I've found my kids focus better watching a short video than they do with the distractions of a whole class mini-lesson. I can also get the information across in a shorter time in a video. 

I'll show the video whole class and we'll pause the video and fill out our anchor charts together. (I make a student copy of the anchor chart for each video). I do lots of "think alouds" during the video and make sure the kids really understand what's expected of them while they're watching an instructional video. 

After we've all completed our anchor charts & glued them into our journals, we make an anchor chart on watching instructional videos. 

Then I have the students think-pair-share what they think they'll be doing for the next activity in the blendspace. They work on the 2nd activity, which incorporates their iPads, on their own. During this time I walk around the room & provide feedback. 

Once everyone has finished, we come back together and discuss the next activity in blendspace. Again, they complete it on their own as I walk around the room. 

Once they're finished, we come back together and discuss things that went well & things that need to change for the next day. 

I tried to choose activities that all students should be able to complete independently, even if they're below level. 

You can download all of the materials for these activities here for FREE.

If you like these activities, be on the look out for more digital math stations in my Teachers Pay Teachers store!

Wednesday, August 12, 2015

Launching Math Workshop, Part 1


I'm super excited about my plans for launching math workshop this year! So excited, that I'm starting a new blog series to explain it all to you!

Last year I went way out of my comfort zone with the structure of my math workshop. It also happened to be my first year in a completely digital classroom - meaning that each kiddo had their own ipad.

You can read more about how my digital math workshop went last year here.

It went pretty well, but I definitely think with the right amount of planning, this year will go better. Last year I pretty much threw my kids to the wolves... I quickly explained the structure and then let them have at it. While there were some advantages to letting the kids problem solve their way through workshop, I definitely didn't set clear enough expectations (which I paid for later in the year).

So that leads me to this year. I'm going to be MUCH more explicit in how I explain and model math workshop.

Over the next few weeks, I'll share with you each step of launching math workshop in the upper elementary classroom, starting with the first week of school. My math workshop is very digital, however you could use the same steps for any classroom!

I start launching math workshop on the 2nd day of school. 

Our first math unit this year is place value, so while I'm teaching the routines of workshop I'm also trying to fit in some place value review and instruction. 

So on day 2 of school, I have the kids take a place value pre-test. You could start day 1 if you're super ambitious : )

The pre-test covers skills from 3rd grade and the new skills they'll learn in 4th grade. I really stress to the kids that this is not for a grade and helps me know what they remember or already know. Click on the picture below to download the pre-test I use for free.


I'll use the data from this pre-test later when I start pulling guided math groups (more on that in a later post).

This also gives us a chance to discuss what the classroom looks like and sounds like during independent work.

Once everyone has finished their pre-test, we set up our math journals. In the past I've had kids create their own table of contents. This year, I'm giving them a template to glue into their journals. Maybe this will keep them neater...

We glue in the table of contents, number the pages in our journal and then add our very first entry: "Place Value Review".

This year I'm going to try having the kids color code their math journals. All the entries on place value will be in one color in the table of contents and then when we switch units, they'll switch colors.


You can download my table of contents template from Google Drive here.

We'll also spend some time discussing our math journals - where we keep them, how we use them, what they should look like, etc.

There you have it - day 1 of launching math workshop!

Next up: introducing kids to blendspace (the website we use for workshop) and instructional math videos 

Wednesday, August 5, 2015

Using Manipulatives to Compare Large Numbers

Comparing numbers using manipulatives

I am a firm believe that older kids need manipulatives in math too! Sometimes I think people forget to make math concrete in the upper grades. However, I've found that the older kids still benefit from hands-on learning, just like in the lower grades.

Sometimes it takes a bit of creativity to figure out the best way to use hands-on materials with upper grade math. When I'm teaching my 4th graders to compare and order numbers, the numbers are too big to use place value blocks. So here are some of my favorite things to use:

Use number cards to play a place value game

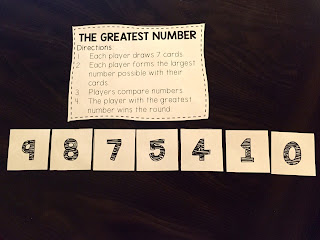
I love to use number cards. This is a game I play with my small groups. Depending on their level, the kids will draw a certain number of cards. (My higher kids will make bigger numbers) Then the kids arrange their cards to make the largest number possible. Then they all compare their numbers. I also use a deck of cards with the face cards removed for this game.

use a place value chart with counters to compare numbers

This strategy is really great for struggling students because it is so visual. I like to put place value charts in sheet protectors {click on the picture to download my FREE place value charts}. Then when we are comparing numbers, we write them in the place value chart with a dry erase marker. This helps the kids line up the numbers correctly. Next I have them place a counter on the digit that helps them compare the two numbers. In this picture, the numbers are the same up until the thousands place. Once we get to the thousands place, we can see that the top number is smaller (the counter is covering up the #8).

Use a small group observation form to keep your notes

When I work with my small groups, I always use a checklist or observation form so I can keep track of my observations. I made an example (with made-up names) to show what they might look like. I've learned that if I don't write it down, I'll forget! It also helps me collect data for our campus intervention meetings.

What are some of your favorite manipulatives to use when you're teaching kids to compare large numbers?

Tuesday, July 14, 2015

Using Blendpsace in your Classroom

I'm linking up with Techie Turtle for Tech Tip Tuesday!


This post is all about how to use blendspace in your digital classroom!

How to use blendspace in your digital classroom

One of my favorite tech tools in my digital classroom is the website Blendspace. I use this website to organize activities for my kids to complete during math workshop. My favorite things about this website are:

  • It's web based so you can use it with any device.
  • It's visually pleasing.
  • It helps kids stay focused on the tasks by ordering them.
  • You can input a variety of media types.
  • It's free!
I created a youtube video showing how to use the website in your classroom. You can check it out here.

When you create a *Free* account with blendspace, your home screen will look like this:
Using blendspace in your digital classroom

You can browse the gallery for lessons that have already been created.
Using blendspace in your digital classroom

When you find a lesson you like, you can make a copy. You'll be able to edit the lesson, so it's okay if you only like part of it. 
Using blendspace in your digital classroom

Using blendspace in your digital classroom

You can also create original lessons by clicking on "New Lesson" from the home screen. 
Using blendspace in your digital classroom
You can add lots of different things to your blendspace. My favorites are youtube videos, practice problems or games from different websites, google docs with instructions and pictures for foldables or hands-on activities, and quizzes. 

Once you're finished, you click share and you'll have a link that you can send to your students. 
Using blendspace in your digital classroom

Have you used Blendspace in your classroom? If so, I'd love to hear about it in the comments!

Check out my FREEBIE on Teachers Pay Teachers that includes the resources and a link to a blendspace I used in my classroom on Comparing Decimals.

Monday, April 20, 2015

Test prep can be fun!

Testing season can be extremely stressful for both the students and the teachers! This year with our new math standards I felt like there was SO much that I needed to review with my kids.

We spent 3 days playing review games to review some math skills. I tried to focus on the standards that will appear the most on the test (in Texas, we have readiness standards) and on skills that lend themselves well to a game.

I put the kids into mixed ability groups and they rotated through 6 different stations. They did 2 stations each day. I walked around and helped kids/took note of who needed to review with me later.

The kids did a great job with the games! I did give them a warning that if they got in trouble, they'd have to do problems out of the book instead of play the games : )

Station 1:
Multiplication Board Game

You can download it for free here

Station 2:
Decimals Board Game - reviewing addition & subtraction with decimals

Station 3:
Long Division Board Game
Station 4:
Fraction war - I have these cards that have fractions with a picture on them, so the kids like to play war to practice comparing fractions.

Station 5:
Spiral Card Game - I got this great free game from Functional Fun on TPT to help the kids practice converting mixed numbers and improper fractions
You can get it for free here

Station 6:
Computer Station - I rarely let the kids just "play" on the laptops or ipads. We have 3 laptops in the classroom, so the kids used to play some fun games on fractions.
I let them choose from any of the fraction and decimal games on math playground

Such a fun way to review some important skills! How do you help your kids review for testing? Follow my blog with Bloglovin

Sunday, March 22, 2015

Elapsed Time

We spent a couple of days this week on elapsed time - a skill that always proves to be tricky for students. I'm also noticing that my 4th graders aren't as good at telling time as they should be, but they never have to read analog clocks in real life! They get much less practice at telling time than my students used to.

As I've mentioned before in posts about math workshop, I use blendspace to organize the workshop activities for the kids. I also record the lessons and they watch it on their ipad at the beginning of workshop. This really helps with their attention and also gives me more time to pull small groups.

Feel free to check out the blendspace I created on elapsed time here

So their first tasks were to watch the videos. For this skill I made 2 videos, each one teaching a different strategy for elapsed time. Once they were done with the videos, they worked at their own pace through the different activities over the course of 2-3 days.

I had made some QR code task cards and put at a set in each table group's bucket. (Each table has a bucket where I put any supplies they will need for math workshop that day). I also put some clock manipulatives. I am fortunate to have a TON of hands-on math tools at my school, so I had enough for each student to get their own clock.

They solved the problem on the task cards using their clock, used the QR code to check their answer, and then took a picture of the problem and the clock showing the answer. When they were done, they put their pictures into pic collage.

I did this activity in small groups with students who I thought may struggle.


The QR task cards are part of my Elapsed Time Lesson Pack, available in my Teachers Pay Teachers store - check it out here.


After the QR task cards, they did versatiles. I had never heard of these until I came to  my current campus last year and they had a set in each room, but now I love them! Ours are a little out dated, but whenever I find a page that correlates with our current skill, I love to use them. Find out more about them here.


Then I had another set of task cards taped around the room that they answered. Some students were still using their clock to help them, while others were relying more on strategies such as t-charts or number lines. When they finished these task cards, they had to come check in with me before they could move on.

The last 2 activities were intended to be more of an extension - if you got to it, great! If not, no worries. One was to plan your dream day and to outline the schedule. They also had to write down how much time they spent on each activity.

The last activity in the blendspace was to do some practice problems on IXL. Our school doesn't have a membership, but kids can do 20 free problems in a day. I like the repetitiveness of IXL, so I typically include some type of this practice each week.


Thursday, September 25, 2014

Math Workshop

I am LOVING math workshop this year! I'm doing something totally different than past years and it's been fantastic. We are 1:1 this year with iPads so we're using technology a lot in all of the content areas. I decided to try an in-class flip model for math workshop. We are using the website Blendspace to house all of the workshop activities.

Here's a breakdown of what my math block looks like. I have 60 minutes a day for math.

Challenge Problem

We start off each block with a challenge problem. These are rigorous/multi-step word problems. The kids have 5 minutes to work out the problem with a partner on their white boards. Then we spend about 5 minutes talking about the problem and sharing different strategies for solving it. The kids love doing the challenge problems and it's a great chance to mix in lots of different skills.

Warm-Up

Each week they get a spiral-review sheet to work on. I break the problems down by day. There are 5 problems for each day. Monday is always vocabulary, Tuesday and Wednesday are skill review and Thursday is problem solving. They don't have any problems on Fridays. As we move on throughout the year, Wednesday will become more problem solving practice. I have an extra block of time for math on Tuesdays when my G/T kids are pulled out. I plan on using this time to go over the previous week's warm-up. My G/T kids typically don't need reteaching on these problems, but I can pull them in a small group during workshop for any reteaching they need.

Workshop

Once the kids finish their warm-up problems for the day, they start their workshop activities. We are using Edmodo at our school this year. I post the link to the blendspace in their Edmodo group. They get a new Blendspace on Mondays and Wednesdays and have 2 days to work on the activities.

What's in a Blendspace?

Every Blendspace starts with a video and an anchor chart. I'm a bit of a control freak (aren't all teachers??) so I make the videos myself because I want the kids to hear it the way I'd explain it. I've been using a screen capturing app (Doceri) on my ipad to record the videos. They're pretty basic - it's what I used to do whole class. For each video there's an anchor chart for the kids to fill out. They glue these into their journals. After the video, the kids have different activities to work on. I'm really trying to follow the concrete - pictorial - abstract model. A lot of times the activities are independent, but there are also partner activities mixed in. The kids also know they can help each other during math workshop.

Small Groups

I have 2 groups of kids that I pull every day. These are kids that I know need some extra hands-on practice with me. I pull them as soon as everyone starts working on their warm-up. This way they get a mini-lesson in with me before they watch the video and work on the activities. After I've worked with those 2 groups, I pull kids for reteaching, work on corrections with kids, and help with their workshop activities. I've been amazed at how much more time I have to work with small groups.

Accountability

After kids finish their anchor charts and glue them into their journals, they bring their journals to me to get checked. This helps me check-in with each student before they start the independent activities. It also helps me make sure they're putting their charts into their journals correctly. Before I did this, I discovered a lot of kids weren't gluing their charts into their journals or were leaving the examples blank.

I give the kids a grade for math workshop based on the activities that they complete. Not every kid will complete all of the activities and that is okay! I always put the activities that I consider the most important towards the beginning. If students are working with me, they won't have as much time to work independently. However, they're still getting practice. I give them a check, check plus or check minus on the different activities they complete during workshop. Then I take an average for the week.

Fridays

Friday is my assessment and reteaching day. We still start off with a challenge problem. Then they have a "quick check" to do. It's 5-10 questions over the skills we've been working on that week. I'm able to check these right away and re-teach that day. Friday is also a day for them to finish their warm-up and any unfinished work from the week.

Wow that was a long post!! Now for some pictures : )


Tuesday, July 22, 2014

5 things to try this year

I don't know about you, but I can get pretty overwhelmed by all the amazing teaching ideas out there. I LOVE learning about new strategies that other teachers are using and then I want to do them all! Unfortunately, that's not realistic. I've learned about so many great things this summer through twitter, blog posts, conferences, articles, etc. It's hard to decide what I'm going to incorporate into my classroom.

I read a great post over on Middle School Mullis about 5 things she's going to try this year. Her post got me thinking about what 5 new things I want to try this year. Here's what I've come up with:

1. Math stations using an in-class flip model. I'm going to do a separate post about my plan for stations. I played around with stations last year and my kids loved them!

2. Independent task cards for enrichment/intervention block. We have a designated block each day for enrichment and intervention. I am working on developing some standard based tasks that students will work through independently.

3. 1:1 with ipads. My campus will be going 1:1 with ipads this upcoming school year. Last year I had 6 ipads for my class to share. I am hoping to really use the technology to take my lessons to the next level and not just replace paper/pencil with an ipad.

4. Class Dojo. I have used Class Dojo in the past as a behavior tool. This year I really want to use it as a way to reinforce academic behavior - participation in a group, creative problem solving, higher level thinking, etc.

5. Coding.  I participated in the Hour of Code last May and I was amazed by my kids. I'd really like to incorporate more opportunities for coding in my classroom. At the very least, I want it to be an option for early finishers and hopefully I'll find more ways to connect it to our curriculum.

What are you planning on implementing next year that's new for you?