25afbf
Facebook Pinterest Instagram Teachers Pay Teachers Blog Lovin' Image Map
Showing posts with label ipads. Show all posts

Wednesday, July 10, 2019

Everything You Need to Know to Flip Your Class

I've been flipping my 4th grade math class for about  years now and I can honestly say it's completely changed the way I teach.

I love sharing how I flip my class with other teachers and I always get asked a lot of questions.
What does a flipped class even mean?
When do you have kids watch videos?
Where do you get your videos?
How do you know your students are paying attention? 

That's why I decided to create this *free* video course on how to flip your class. 

Click the picture below to sign up now!


This email course consists of 4 videos where I walk you through everything you need to know to start flipping your own class.

I'll cover Flipping 101
- What is a flipped class?
- Why do I flip my class?
- What does my flipped math class look like?

You'll learn All About the Videos
- How do you make videos?
- Where can you find videos?
- How do you choose a good video for students?


I'll tell you how to Hold Students Accountable
- How do you know students are paying attention?
- How can you have students reflect after lessons?

Finally, I'll help you Put It All Together
- I'll give you bonus tips and tricks to make your life easier
- I'll show you what one of my flipped lessons looks like so you have an example


Sunday, August 14, 2016

Going Digital with Google: Student Portfolios


The last two years I piloted student portfolios for my district. After some trial and error, what we found to work best for student portfolios in upper elementary school was to use Google Slides.

Our grading period is made up four 9-week periods, so we had our students select a piece of work for each grading period. My district really emphasized that students should have ownership of their portfolio. We talked a lot about how to choose quality work, but at the end of the day the kids had complete freedom to choose something they were proud of.

We created a template for students - you can check it out here. At the end of the 9 weeks the students selected a work sample. Many times this was something digital that they already had saved in Google Drive. If they selected something that was on paper, they took a picture of it. Then they had to reflect on why they chose that piece of work.

The whole process didn't take more than 30 minutes and at the end of the year, they had a collection of 4 meaningful pieces of work. It was great to share at Open House and spring conferences.

Sunday, July 24, 2016

Going Digital with Google: Google Slides (plus a link up!)

If you've been following along for a while, then you know my math workshop has been digital for the last 2 years. You also know that I've been using a website called Blendspace to house my math workshop directions. I even did a blog post you can check out.

I thought Blendspace was the greatest thing ever. And it still has some redeeming qualities, but it also had some downfalls. Like some days the site was reeaaaally slow to load. When I included sites to visit within blendspace it was a bit glitchy on the ipads. My class didn't have usernames so they were still recording work other places and both the kids and I were constantly clicking back and forth.

Now let's fast forward to January 2016. I discovered a great group of teacher-authors on Teachers Pay Teachers who introduced me to using Google Slides in place of Blendspace. Now I knew all about Google. My kids were using Google Drive to back things up and we used Google Classroom. That being said, it had never crossed my mind to use Google Slides in a new way!

So here are my top 3 things I love about using Google Slides for math workshop.
stay with me people, there's a link up at the bottom : )

#1
I can house EVERYTHING in one place. My directions are in slides. Any links or videos are in slides. Ask a reflection question? They type their answer right on the slide. Building something with manipulatives? Take a picture and (you guessed it) put it right on the slide. Seeing a theme here? This was a game changer folks. For me and the kids. In fact, when I asked what they liked about Google Slides, the #1 thing was no longer having to click back and forth or keep up with separate papers. 

#2
It works seamlessly with Google Classroom. I love that I can click the magical make a copy for each student button and voi la! Every kid has their own editable copy. Huge time saver! Google Classroom also automatically backs everything up to their Google Drive so it's a built in student portfolio. 
 What in the world is Google Classroom?! Read about it here

#3
I love that using Google Slides is teaching my kids valuable computer skills. These are skills that I think they will carry on for many years. Sometimes I forget that I need to teach them basic skills because they seem so tech savvy. 

Yeah that all sounds great, but what does it really look like?? Here's a sneak peek into my latest Google Slide on Comparing and Ordering numbers.

Congrats! You made it to the end. As promised...here's a fabulous link up hosted by Mrs. Beers, Danielle Knight and The Daring English Teacher for Innovative Classroom Learning Day. Check out the links below to find other blog posts and digital products to check out.

Leave a comment and let me know how you plan on using Google in your classroom this year!


Tuesday, July 5, 2016

Going Digital with Google: Google Forms for Quizzes


One thing I love about Google is that they are constantly updating their apps. They just released an update that makes it even easier to use Google Forms for quizzes.

I made a video tutorial to show you how easy it is to create, score & analyze quizzes using forms.
Click on the video below to learn more!

Sunday, January 17, 2016

Solving Word Problems in a Digital Classroom

Last year I spent a couple of weeks teaching my kids how to analyze word problems. You can read all about my lessons here .


This year I did the same lessons, with a digital twist. I am really trying to incorporate more digital activities now that I'm in my second year of going 1:1 with students to iPads. 

The first day of our problem solving unit, we created a key words chart. Last year, I had the kids write on a a recording sheet like this:

This year I created the recording sheet in Google Docs and shared it with my student in Google Classroom. In Google Classroom you are able to make a copy of a Google Doc for each student. As we acted out word problems using manipulatives, we added to the Google Doc. The students each added to their own chart - this kept them more engaged than if they watched me create the chart. Now instead of having a copy in their math journals, they have a copy in Google Drive. 

On the second day of the unit, I had students sort word problems by the 4 operations. They had to write a number sentence and an explanation for each problem. Last year it looked like this:

This year instead of using paper/pencil, the kids took pictures of the word problems and put the number sentence and explanation into a pic collage. So now it looked like this:

Now, not everything lends itself to a digital activity. Sometimes I still need my students doing paper/pencil activities. However, when I'm able to make something digital I see an increase in engagement and ownership. The reduction in copies and paper is an added bonus. 

How do you incorporate digital activities into your math block?

Interested in my word problem lesson plans? The first 3 days are available in my Teacher Pay Teacher store:

Tuesday, September 29, 2015

Giving kids choices

One of my favorite ways to keep my students engaged is to give them choice. Sometimes I over think this concept. I try to find small ways to incorporate student choice in our daily activities.

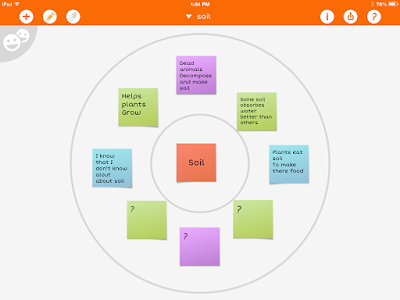
Today in science we started a new unit on soil. I wanted the kids to brainstorm what they already knew about soil. My plan was for students to make a graphic organizer - we use thinking maps at my school. I told them they could make a bubble map or a circle map (2 organizers that include a topic in the middle with facts surrounding it). The kids had a choice of using paper/pencil or any app they had on their ipads. I'm always amazed by how creative the kids can be - I'm also amazed at how different they are!

Here are some samples of what they came up with. You'll notice they're all very different, but they also achieve the same purpose.


I love that each student got to let their personality and unique learning styles show. How do you incorporate student choice into your classroom?

Sunday, September 20, 2015

Digital Number Lines & Rounding

This week my kids are learning to round large numbers. I really want them to understand rounding and not just memorize tricks. In the past I would teach my kids a poem, and while they could round, they didn't really understand why.

Since my classroom is digital, I'm always looking for ways to use our ipads for our math workshop activities.

I found this *free* app called Number Line.


My kids are going to use this app to practice rounding some larger numbers. They'll take screen shots of each number they round and then put them together in pic collage. I made a video to show them how they'll be using the app for the activity.

Check it out:


Here's an example of one of my student's finished products:


How do you teach your kids rounding?

Sunday, September 13, 2015

Launching Math Workshop, Part 4


Just joining in? Check out the rest of this blog series!

Read on to find out what day 4 of math workshop looks like.

By day 4, I'm just excited that I've made it to the end of the first week! I'm also amazed by how well my kids are doing with math workshop. The structure is very different than what they're used to and there's a lot for them to figure out.

Day 4 is all about creating workshop rules & becoming independent.

Before the kids start working, we create an anchor chart on our math workshop rules. The class helps decide on the rules based on their experiences throughout the week. Of course I forgot to take a picture of our anchor chart...

Our rules focused on working the whole time, using math tools appropriately (tools, not toys), working together (helping, not giving answers), problem solving, and reading the directions (I really try to make a big deal out of this one). 

Once we've reviewed the rules and the structure of math workshop, I have the kids hold up a number to show me what box they are on in our blendspace. (Wondering what blendspace is? Check out this post).

Then we spend the rest of the time working on finishing up the activities. Here are a couple of pictures of my kids hard at work.


You can find all of the activities my kids did, including the video, in my Teachers Pay Teachers store.


That ends my week of launching math workshop! Over the next couple of weeks I'll be reinforcing routines with students and helping them understand where and how to turn their work in. By the 3rd week, I'll start pulling my guided math groups. 

Thursday, August 27, 2015

Classroom Scavenger Hunt

It seems like every year in the spring, I still have kids asking me where things are in the classroom. How can they not know where the trashcan is by March?!

I always start off the year by giving a tour of the classroom, but I realize now that they're trying to take in so much information those first few days that they just can't remember it all.

This year is different! This year one of our first week activities was a ...
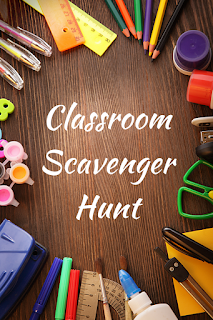
Classroom Scavenger Hunt

First I decided on the most important things in the classroom. These are things the kids will use an almost-daily basis. I tried not to pick too many things because I really wanted them to remember where everything was! I also didn't want the activity to take forever...

You can see my scavenger hunt below. If you click on the picture, you can download a free copy and edit it to fit your classroom.
Classroom Scavenger Hunt

I paired my kids up and had them work together to find each item. I didn't make it a competition. This early in the year, I really don't know my kids well enough to know what they can handle. I was a little wary of sending them loose around the classroom in a race : )

I'm very lucky to teach at a school where each student has their own school-issued ipad. We get started using them right away, so I wanted to include a digital aspect to my scavenger hunt. I had the kids take a picture of each item in the scavenger hunt. They put them all together in the free app: Pic Collage Kids. This is an app we'll use all year and most of my kids are already familiar with it. Again, since it's so early in the school year I try to keep things fairly simple.

In my free download on Teachers Pay Teachers, I also included some other digital ideas.

Classroom Scavenger Hunt

Now when my kids ask me where the trash can is in March, I can kindly redirect them to look at their Pic Collage.

How do you help your kids learn their way around your classroom? Comment below!

Wednesday, August 12, 2015

Launching Math Workshop, Part 1


I'm super excited about my plans for launching math workshop this year! So excited, that I'm starting a new blog series to explain it all to you!

Last year I went way out of my comfort zone with the structure of my math workshop. It also happened to be my first year in a completely digital classroom - meaning that each kiddo had their own ipad.

You can read more about how my digital math workshop went last year here.

It went pretty well, but I definitely think with the right amount of planning, this year will go better. Last year I pretty much threw my kids to the wolves... I quickly explained the structure and then let them have at it. While there were some advantages to letting the kids problem solve their way through workshop, I definitely didn't set clear enough expectations (which I paid for later in the year).

So that leads me to this year. I'm going to be MUCH more explicit in how I explain and model math workshop.

Over the next few weeks, I'll share with you each step of launching math workshop in the upper elementary classroom, starting with the first week of school. My math workshop is very digital, however you could use the same steps for any classroom!

I start launching math workshop on the 2nd day of school. 

Our first math unit this year is place value, so while I'm teaching the routines of workshop I'm also trying to fit in some place value review and instruction. 

So on day 2 of school, I have the kids take a place value pre-test. You could start day 1 if you're super ambitious : )

The pre-test covers skills from 3rd grade and the new skills they'll learn in 4th grade. I really stress to the kids that this is not for a grade and helps me know what they remember or already know. Click on the picture below to download the pre-test I use for free.


I'll use the data from this pre-test later when I start pulling guided math groups (more on that in a later post).

This also gives us a chance to discuss what the classroom looks like and sounds like during independent work.

Once everyone has finished their pre-test, we set up our math journals. In the past I've had kids create their own table of contents. This year, I'm giving them a template to glue into their journals. Maybe this will keep them neater...

We glue in the table of contents, number the pages in our journal and then add our very first entry: "Place Value Review".

This year I'm going to try having the kids color code their math journals. All the entries on place value will be in one color in the table of contents and then when we switch units, they'll switch colors.


You can download my table of contents template from Google Drive here.

We'll also spend some time discussing our math journals - where we keep them, how we use them, what they should look like, etc.

There you have it - day 1 of launching math workshop!

Next up: introducing kids to blendspace (the website we use for workshop) and instructional math videos 

Tuesday, July 21, 2015

5 Tips for Using Screencasting in the Classroom


Tips for using screencasting in the classroom

Are you using screencasting in your digital classroom? I use it all the time. Here are my top 5 tips for screencasting in your digital classroom:


There are lots of different apps out there that you can use. My personal favorite is Doceri. There are a lot of fancy things you can do with it, but I mainly use it for the basic screencasting functions. You can check out my youtube video for a tutorial on using the app on your ipad.


Use a screencasting app to create your own instructional videos. You don't have to do a flipped class model to benefit from instructional videos. I record my math lessons using Doceri and the kids watch them at the beginning of math workshop. I can record a 15 minute lesson in about 5 minutes without all their sweet interruptions : ). I've found their attention span is a lot better for the video than a whole class lesson and the kids told me they paid attention to the video better!

Like the idea, but don't want to actually make the videos?? I get it. I've incorporated my videos into digital lessons you purchase. The kids loved my perimeter and area digital lesson, especially the dream bedroom activity at the end! 


When you screencast a lesson, include pictures of your anchor charts. You can use a stylus to write in on the anchor charts. I like to create my "charts" in powerpoint, save them as an image and then put them as the background on my Doceri slides. Then I print off a copy for my students and they fill them in as they watch the videos. 


Another way to use instructional videos is to post them on your class website. This works great as a homework helper for students (and parents love it too!). I've found this especially helpful when my kids are working on a new, complex skill like long division. 


Your students can use screencasting too! My kids love creating their own videos to share with me and other students. It's a great way to get kids explaining their thinking. Check out this *adorable* video one of my kiddos made explaining how to decompose fractions. A bonus is getting to listen to their sweet voices : )

Looking for more ways to go digital? Check out my post on using Google Slides for math workshop!

Here's a fabulous link up hosted by Mrs. Beers, Danielle Knight and The Daring English Teacher for Innovative Classroom Learning Day. Check out the links below to find other blog posts and digital products to check out.


Tuesday, July 14, 2015

Using Blendpsace in your Classroom

I'm linking up with Techie Turtle for Tech Tip Tuesday!


This post is all about how to use blendspace in your digital classroom!

How to use blendspace in your digital classroom

One of my favorite tech tools in my digital classroom is the website Blendspace. I use this website to organize activities for my kids to complete during math workshop. My favorite things about this website are:

  • It's web based so you can use it with any device.
  • It's visually pleasing.
  • It helps kids stay focused on the tasks by ordering them.
  • You can input a variety of media types.
  • It's free!
I created a youtube video showing how to use the website in your classroom. You can check it out here.

When you create a *Free* account with blendspace, your home screen will look like this:
Using blendspace in your digital classroom

You can browse the gallery for lessons that have already been created.
Using blendspace in your digital classroom

When you find a lesson you like, you can make a copy. You'll be able to edit the lesson, so it's okay if you only like part of it. 
Using blendspace in your digital classroom

Using blendspace in your digital classroom

You can also create original lessons by clicking on "New Lesson" from the home screen. 
Using blendspace in your digital classroom
You can add lots of different things to your blendspace. My favorites are youtube videos, practice problems or games from different websites, google docs with instructions and pictures for foldables or hands-on activities, and quizzes. 

Once you're finished, you click share and you'll have a link that you can send to your students. 
Using blendspace in your digital classroom

Have you used Blendspace in your classroom? If so, I'd love to hear about it in the comments!

Check out my FREEBIE on Teachers Pay Teachers that includes the resources and a link to a blendspace I used in my classroom on Comparing Decimals.

Sunday, March 22, 2015

Elapsed Time

We spent a couple of days this week on elapsed time - a skill that always proves to be tricky for students. I'm also noticing that my 4th graders aren't as good at telling time as they should be, but they never have to read analog clocks in real life! They get much less practice at telling time than my students used to.

As I've mentioned before in posts about math workshop, I use blendspace to organize the workshop activities for the kids. I also record the lessons and they watch it on their ipad at the beginning of workshop. This really helps with their attention and also gives me more time to pull small groups.

Feel free to check out the blendspace I created on elapsed time here

So their first tasks were to watch the videos. For this skill I made 2 videos, each one teaching a different strategy for elapsed time. Once they were done with the videos, they worked at their own pace through the different activities over the course of 2-3 days.

I had made some QR code task cards and put at a set in each table group's bucket. (Each table has a bucket where I put any supplies they will need for math workshop that day). I also put some clock manipulatives. I am fortunate to have a TON of hands-on math tools at my school, so I had enough for each student to get their own clock.

They solved the problem on the task cards using their clock, used the QR code to check their answer, and then took a picture of the problem and the clock showing the answer. When they were done, they put their pictures into pic collage.

I did this activity in small groups with students who I thought may struggle.


The QR task cards are part of my Elapsed Time Lesson Pack, available in my Teachers Pay Teachers store - check it out here.


After the QR task cards, they did versatiles. I had never heard of these until I came to  my current campus last year and they had a set in each room, but now I love them! Ours are a little out dated, but whenever I find a page that correlates with our current skill, I love to use them. Find out more about them here.


Then I had another set of task cards taped around the room that they answered. Some students were still using their clock to help them, while others were relying more on strategies such as t-charts or number lines. When they finished these task cards, they had to come check in with me before they could move on.

The last 2 activities were intended to be more of an extension - if you got to it, great! If not, no worries. One was to plan your dream day and to outline the schedule. They also had to write down how much time they spent on each activity.

The last activity in the blendspace was to do some practice problems on IXL. Our school doesn't have a membership, but kids can do 20 free problems in a day. I like the repetitiveness of IXL, so I typically include some type of this practice each week.


Sunday, February 8, 2015

Solving Word Problems

This year we changed the pacing of our instruction a little bit. We spent a chunk of time teaching the 4 operations, with heavy emphasis on the skills. Once the students had learned all 4 of the operations, we set aside 2 weeks to focus on problem solving using all of the operations.

In the past we would teach a skill and then look at word problems using that skill. I noticed that I wasn't spending a lot of time explicitly teaching kids how to determine which operation to use. I also realized a lot of kids would catch on to the fact that the word problems were over the skill we were practicing. They didn't have to do a lot of analysis to figure that out.

So this week we spent all week looking at simple word problems. I wanted to spend time explicitly teaching kids strategies to help them solve different types of word problems.

Day 1:
On Monday we looked at example word problems for each operation. We did the same activity 3 different times. First I modeled it whole group, then they worked in small groups of 4, and finally they did it again on their own.

We took 4 problems (1 for each operation) and looked for key words that helped us decide on the operation. We highlighted those words. Then we wrote a sentence explaining how we knew which operation to use. Finally, we wrote a number sentence showing the solution to the problem.


Day 2:
On Tuesday, I wanted the kids to really focus on some of the big concepts for each operation. Looking back, I think it would have been better to flip the activities for Day 1 & Day 2. 

I wrote some simple 1-step word problems for each operation. I passed out different math manipulatives to each table. I displayed one problem at a time and had the students "act out" the problem with the manipulatives. Then we worked together to write a number sentence and discuss what words in the problem helped us know what to do. 


After about 15-20 minutes of acting out different word problems, I collected the manipulatives and passed out a recording sheet. The sheet had 4 sections with an operation symbol at the top of each section. We had a class discussion about the things we noticed for the different operations and recording these observations on the sheet. Some of the big things we talked about were that addition and multiplication give us a larger number and subtraction and division give us a smaller number. We also talked about the fact that multiplication and division have equal groups, while addition and subtraction don't need equal groups. 

Day 3:

 Wednesday, I introduced the kids to a problem solving strategy that I have used in the past. The acronym is CUBES:

Circle the numbers
Underline key words
[Bracket the question]
Eliminate extra info.
Solve the problem 

I explained that this strategy helps them focus in on the important parts of a problem. This will become more important when we start looking at more complex problems. 

Like Monday, we did the same activity 3 different times. I modeled the steps, they worked it out in pairs, and then did it individually. 

I had copied different word problems on a recording sheet. Their first step was to do CUBES to the problem. Then they had to write a number sentence showing how to solve the problem. Once they had the answer, they had to write the answer in a complete sentence (this was harder than you would think!). Finally, they had to justify their answer. We referred back to our chart from Tuesday to help us explain why our answer was reasonable. 


Day 4:

This year our math curriculum specifies that students need to be able to use strip diagrams to represent problems involving the 4 operations. I wanted to spend a day looking at different strip diagrams. The kids had seen these diagrams on our spiral review warm-ups and a lot of them had a difficult time with strip diagrams modeling multiplication or division.

There's a great website and app called Thinking Blocks. We used this to help the kids practice with different diagrams. I don't have a smart board in my room, but we have a "smart pen" that turns the regular board into an interactive board. We used that to practice some different diagrams together.

Then I let the kids spend time in pairs, or independently, playing on the app. We used the addition/subtraction and multiplication/division apps. They were begging for more!


Day 5:

Friday is our assessment day. I gave the kids 8 one-step word problems. They had to use the CUBES problem solving strategy and show their work for each problem. They did a great job! While, I still have some kids who are struggling with the skills, every student knew which operation to do on the different problems. Woohoo!!

Next week we are looking at interpreting remainders and multi-step problems (including problems with extra info.)

Thursday, September 25, 2014

Math Workshop

I am LOVING math workshop this year! I'm doing something totally different than past years and it's been fantastic. We are 1:1 this year with iPads so we're using technology a lot in all of the content areas. I decided to try an in-class flip model for math workshop. We are using the website Blendspace to house all of the workshop activities.

Here's a breakdown of what my math block looks like. I have 60 minutes a day for math.

Challenge Problem

We start off each block with a challenge problem. These are rigorous/multi-step word problems. The kids have 5 minutes to work out the problem with a partner on their white boards. Then we spend about 5 minutes talking about the problem and sharing different strategies for solving it. The kids love doing the challenge problems and it's a great chance to mix in lots of different skills.

Warm-Up

Each week they get a spiral-review sheet to work on. I break the problems down by day. There are 5 problems for each day. Monday is always vocabulary, Tuesday and Wednesday are skill review and Thursday is problem solving. They don't have any problems on Fridays. As we move on throughout the year, Wednesday will become more problem solving practice. I have an extra block of time for math on Tuesdays when my G/T kids are pulled out. I plan on using this time to go over the previous week's warm-up. My G/T kids typically don't need reteaching on these problems, but I can pull them in a small group during workshop for any reteaching they need.

Workshop

Once the kids finish their warm-up problems for the day, they start their workshop activities. We are using Edmodo at our school this year. I post the link to the blendspace in their Edmodo group. They get a new Blendspace on Mondays and Wednesdays and have 2 days to work on the activities.

What's in a Blendspace?

Every Blendspace starts with a video and an anchor chart. I'm a bit of a control freak (aren't all teachers??) so I make the videos myself because I want the kids to hear it the way I'd explain it. I've been using a screen capturing app (Doceri) on my ipad to record the videos. They're pretty basic - it's what I used to do whole class. For each video there's an anchor chart for the kids to fill out. They glue these into their journals. After the video, the kids have different activities to work on. I'm really trying to follow the concrete - pictorial - abstract model. A lot of times the activities are independent, but there are also partner activities mixed in. The kids also know they can help each other during math workshop.

Small Groups

I have 2 groups of kids that I pull every day. These are kids that I know need some extra hands-on practice with me. I pull them as soon as everyone starts working on their warm-up. This way they get a mini-lesson in with me before they watch the video and work on the activities. After I've worked with those 2 groups, I pull kids for reteaching, work on corrections with kids, and help with their workshop activities. I've been amazed at how much more time I have to work with small groups.

Accountability

After kids finish their anchor charts and glue them into their journals, they bring their journals to me to get checked. This helps me check-in with each student before they start the independent activities. It also helps me make sure they're putting their charts into their journals correctly. Before I did this, I discovered a lot of kids weren't gluing their charts into their journals or were leaving the examples blank.

I give the kids a grade for math workshop based on the activities that they complete. Not every kid will complete all of the activities and that is okay! I always put the activities that I consider the most important towards the beginning. If students are working with me, they won't have as much time to work independently. However, they're still getting practice. I give them a check, check plus or check minus on the different activities they complete during workshop. Then I take an average for the week.

Fridays

Friday is my assessment and reteaching day. We still start off with a challenge problem. Then they have a "quick check" to do. It's 5-10 questions over the skills we've been working on that week. I'm able to check these right away and re-teach that day. Friday is also a day for them to finish their warm-up and any unfinished work from the week.

Wow that was a long post!! Now for some pictures : )